Gear Up and Sing Out: How to Build Your Dream Home Karaoke System on Any Budget
Let's be honest — there's nothing quite like belting out your favorite song in front of friends without the pressure of a crowded bar. Home karaoke has exploded in popularity, and the gear available today is genuinely impressive, even at the lower end of the price spectrum. But with so many options flooding the market, figuring out where to start can feel overwhelming.
We've done the legwork. Here's a real-talk breakdown of what you actually need, what's worth splurging on, and what you can skip — organized by budget so you can build a setup that fits your space and your wallet.
Start With the Basics: What Every Home Setup Needs
Before diving into specific products, it helps to understand the core components of any home karaoke rig:
- Microphones — the obvious starting point
- Speakers or a PA system — because your TV's built-in audio won't cut it
- A mixing board or audio interface — to blend mic and music audio
- Software or a dedicated karaoke machine — to actually run your song catalog
- A display — your TV, a projector, or a dedicated monitor
You don't need all of these to be top-shelf. The trick is knowing which components to prioritize.
Budget Tier ($150–$400): Get the Party Started Without Breaking the Bank
If you're new to home karaoke or just testing the waters, this range gets you a surprisingly solid experience.
Microphones: The Moukey Dynamic Karaoke Microphone (around $30 for a two-pack) is a crowd favorite in this tier. It's wired, which means zero latency — a big deal when you're trying to stay on beat. If you want to go wireless, the GTD Audio G-380H offers decent range and clarity for under $80 a pair.
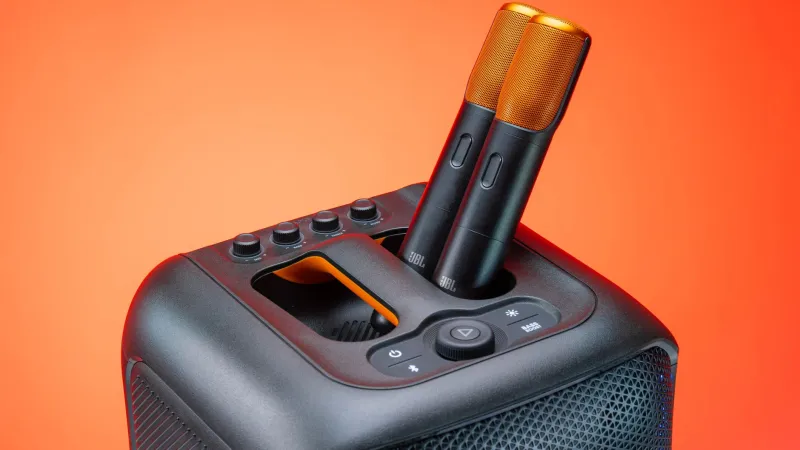
Speakers: The Singing Machine Bluetooth Karaoke System (around $100–$150) bundles a speaker, mic input, and basic lighting effects into one unit. It's not audiophile-grade, but for a living room sing-along, it absolutely works. Alternatively, a JBL PartyBox 110 gives you noticeably better sound and more volume headroom for around $280.
Software: Karafun is the go-to app in this price range. Their subscription runs about $17/month and gives you access to over 60,000 songs. The interface is clean, it works on PC, Mac, tablet, and Firestick, and the lyrics display is easy to read. For a free option, UltraStar Deluxe is an open-source platform that lets you download individual song files — more setup required, but zero ongoing cost.
Pro tip for small rooms: In a standard living room (roughly 12x15 feet), a single Bluetooth speaker placed at head height near your display creates a natural stage feel without overwhelming the space.
Mid-Range Tier ($400–$900): When You're Serious About the Experience
This is the sweet spot for most home enthusiasts. You're getting real audio quality and meaningful flexibility.
Microphones: Step up to the Shure SM58 — the industry standard for live vocals, period. At around $99 each, they're a genuine investment, but the clarity and durability are unmatched. Pair two of them with a simple XLR cable run and you're set for years.
Mixer: The Behringer XENYX Q1202USB (around $120) gives you four mic/line inputs, built-in EQ, and USB audio output. It's straightforward enough for beginners but powerful enough to grow with. This is where the magic happens — being able to adjust mic volume independently from your backing track makes a massive difference in how polished everything sounds.
Speakers: A pair of Mackie Thump12A powered speakers (around $300–$350 each, though often found on sale) will fill a large den or basement with ease. If budget is tight, a single unit works fine for rooms under 300 square feet.
Software: At this level, consider upgrading to Karaoke Version (karaoke-version.com) for individual song purchases, or Stingray Karaoke for a broader streaming library. Both offer better audio quality than free alternatives.
Room layout tip: For medium rooms (15x20 feet or larger), position your speakers at 45-degree angles facing the performance area, with your display centered between them. This mirrors a real stage setup and genuinely elevates the vibe.
Premium Tier ($900–$2,000+): Full Venue Energy at Home
If you're building a dedicated karaoke room, a finished basement, or a backyard entertainment area, this is where things get really fun.
Microphones: The Sennheiser EW 135P G4 wireless system (~$400/channel) delivers broadcast-level clarity with a reliable 300-foot range. Zero dropouts, zero static, and they look the part too.
PA System: A QSC K12.2 powered speaker ($700 each) is what professional touring acts use for monitors. A pair of these in a dedicated karaoke room is genuinely jaw-dropping. Add a QSC KS112 subwoofer ($700) if you want that chest-thumping low end.
Mixer: The Yamaha MG10XU (~$200) adds built-in effects processing, including reverb and compression — tools that make even average singers sound polished.
Software: Vokal and Sound Choice are worth exploring at this level for their high-quality CDG file libraries. For the most seamless experience, dedicated karaoke software like Siglos Karaoke Player/Recorder gives you full control over your local library with professional-grade features.
Display: A 75-inch 4K TV or a short-throw projector throwing a 100-inch image transforms your space completely. Mount it at eye level for performers — not above the fireplace.
Connectivity Tips That Everyone Forgets
Regardless of your budget tier, a few universal rules apply:
- Always use XLR cables over 3.5mm jacks when possible. The signal quality difference is real.
- Latency is the enemy. If you're using Bluetooth speakers, make sure they support aptX Low Latency codec. Even a 100ms delay between your voice and the audio is enough to throw off a performance.
- Run a dedicated circuit if you're powering multiple active speakers. Tripped breakers mid-song are a mood killer.
- Label everything. Seriously. Future-you will thank present-you.
The Bottom Line
You don't need to spend a fortune to have a genuinely great time. A $300 setup done right will beat a $1,500 setup thrown together carelessly every single time. Know your room, match your gear to your space, and don't cheap out on the microphones — that's the one component where quality is immediately, unmistakably noticeable.
Your stage is waiting. Now go build it.